BUILDING THE E30 WAGON
First of all, welcome to the Kevve-Inc blog! We'll share some behind the scenes and stories on here, expect to see lots of cars, beautiful places and Kevve-Inc apparel here!

Back in 2018, this is how the E30 looked when I bought it from a young guy who wanted to make it into a project but afteral didn't want to start it. Went seeing the car in the afternoon, gave him the money and picked up later that evening with my buddy Kevin! It was a scary drive home tho as the header gasket was blown, engine was overheating very fast and it wasn't told to me, but hey, it was a great buy afterall! And as you can see it was already lowered with probably the worse coilovers ever. Felt like driving without springs.

Drove the car home and a few days later took it to Jeroen from J-wheels as he had more space to store the car and he'd be doing the engine works while Tom the paintwork. Did some quick testfits to see how wide we had to roll the wheel arches and which width of wheels we could fit. After that, I dismantled the whole car in just a few days (cold winter days) but I had Bentley & Tesla with me so it was pretty fun!


It looked like the body was in good shape but there was rust to be found on many pieces like the trunk and underside. We ended up by changing the whole trunk as it would probably end up in more work then being worth it. As almost every Bmw E30 the underside had suffered some rust issues over the years and as much as I hate rust, it had to go. All the bad pieces were cut out and being replaced. While the car was fully stripped underneath we also applied a new protection coat so it can go another 30 years without worries.


As I made the wheelarches bigger to fit wider wheels and air it out without any problems Tom was preparing the car for basecoat and paint afterwards.


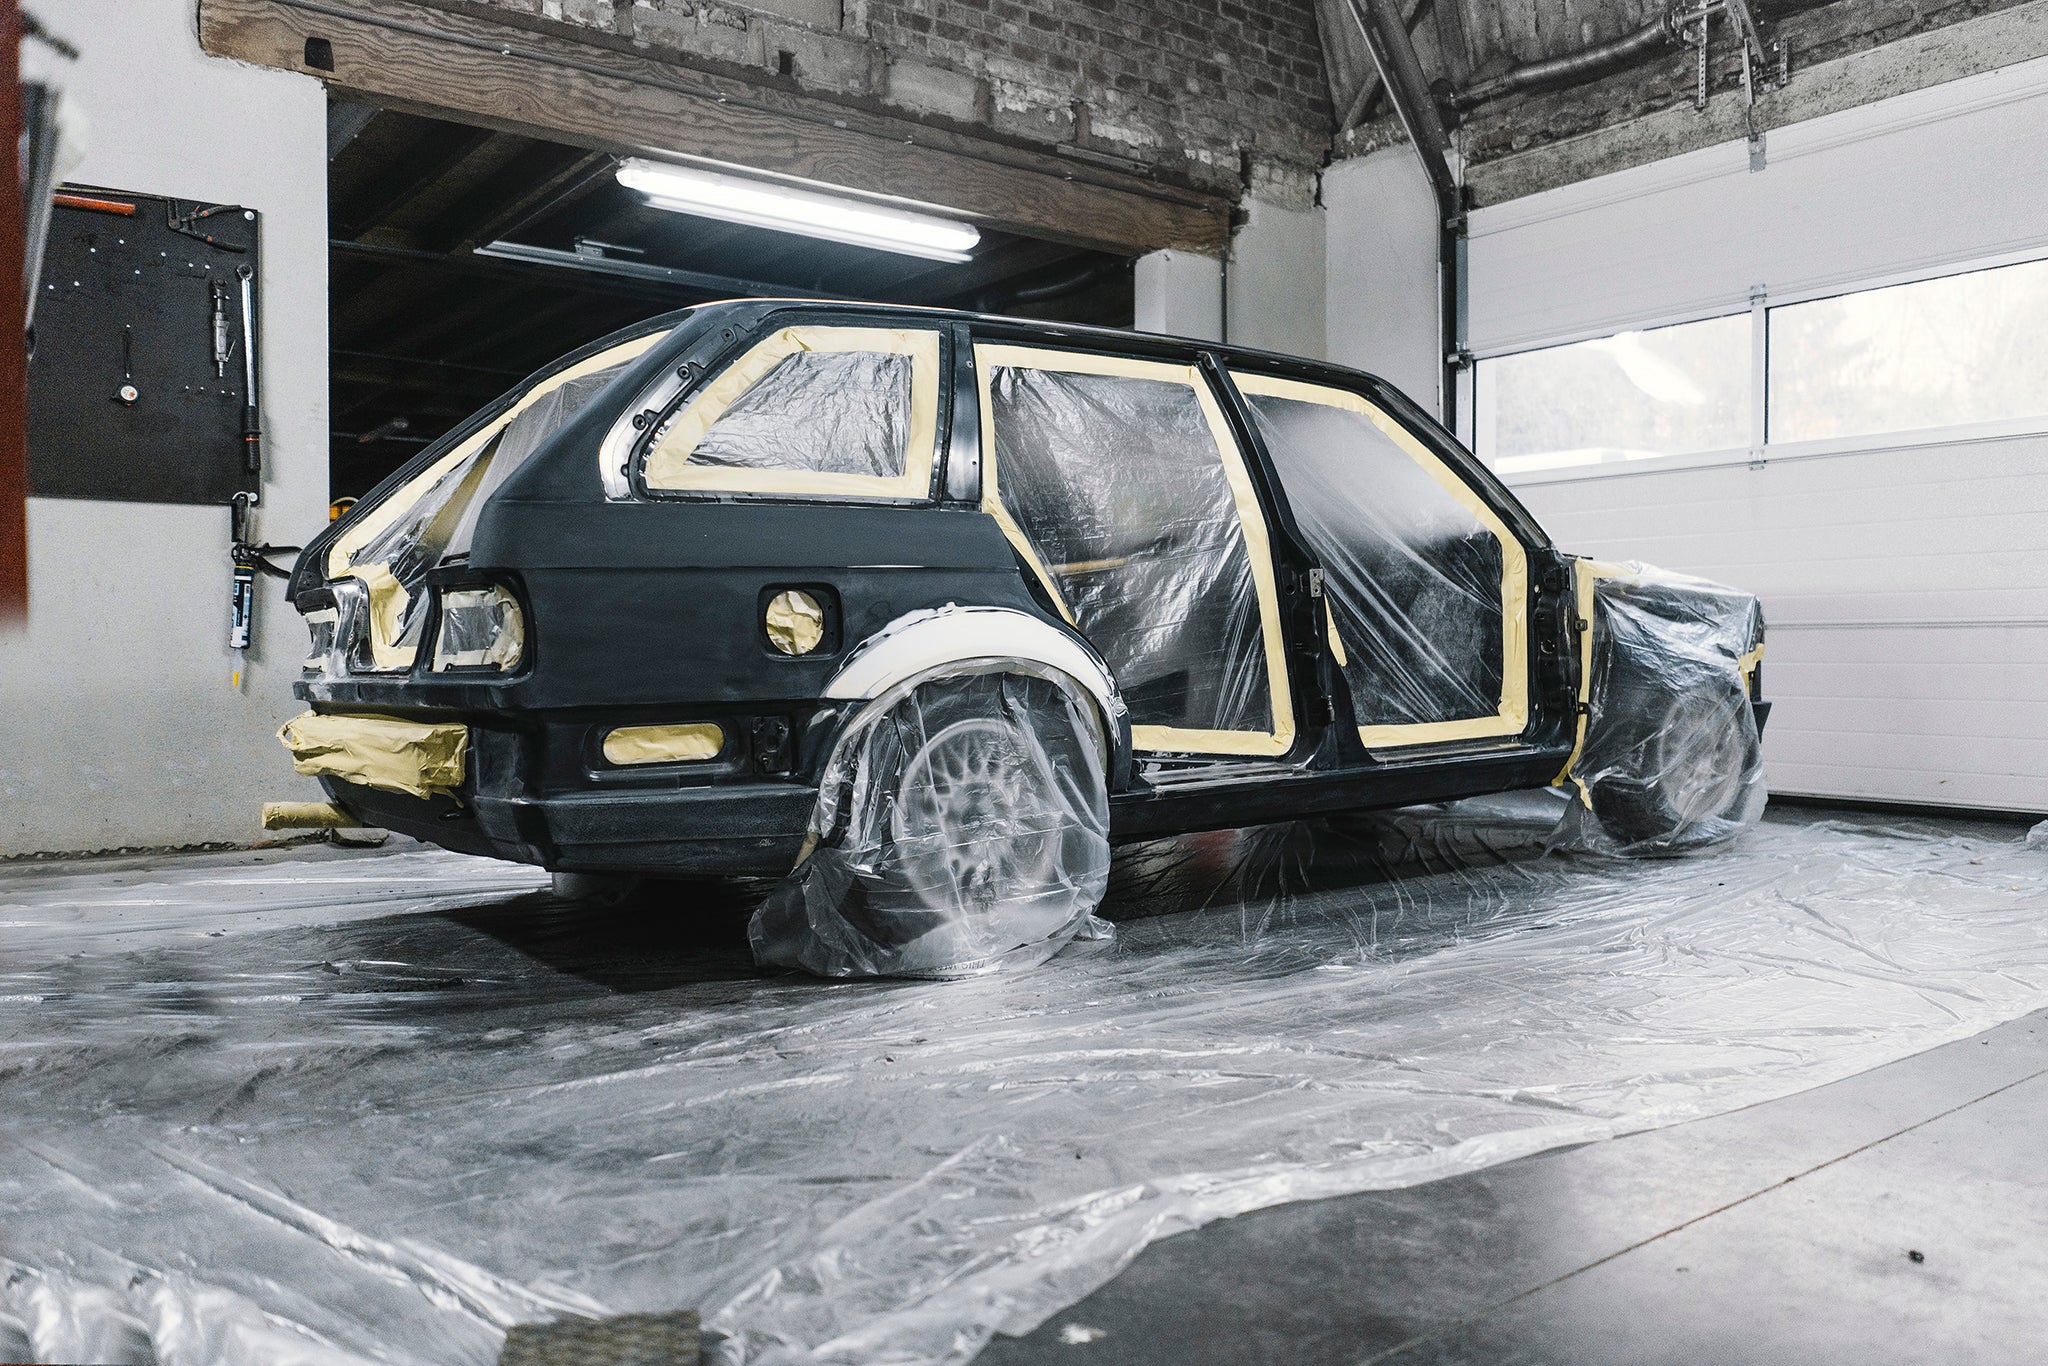
I always liked grey colors on classic cars, while my previous E30 was also painted grey I liked to re-do that one but with a different kind of grey. One with some discrete metal flakes in it. We ended up using an original Bmw color from the 6 series.

![]()
As this part of the build was done, it's time to start assembling the car and adding all the fun parts, the most fun process of the build in my eyes. The more 'cleaner' work. I love clean work - Ha!

As we went already over the 'budget' we decided to go that extra mile and finish the car in total with all redone and new parts. Originally this wasn't the plan as we tought the car and parts were in better shape, which they didn't. Paint and bodyworks already came out double the price so why not break the bank in total - lol! Project cars are real moneypits but better do it right from the first time while you're on it.

Fitted the front and rear suspension so the engine could go in again. Jeroen from J-wheels did the full rebuild on the engine while it was out. New head, new gaskets everywhere, new belts everywhere, new clutch, new... everything. There's nothing I hate more then a shiny car with all the bells and whistles but with a faulty engine. And while the engine is out, you got to take advantage of it to make it trustworthy.

Time to put that engine back in and finish all the transmission and engine works.

As I had other wheel in order at Rotiform but something went wrong with them delivering the wrong wheels and not those that I ordered (not sponsored) I didn't want to wait another 6 months for the correct wheels to arrive. Jeroen had some BBS LeMans laying around and we adjusted them to fit and I requested a fancy finish to them! In the end, the 17" BBS LeMans wheels were a perfect fit and great look to the car! Everything happens for a reason, right?

Brushed centers with a matte varnish over it, polished between the spokes with a matte varnish and finished with polished lips and black hardware. I couldn't even dream of better wheels! 8J in the front and 9J in the rear!

I didn't want those typical stretched tires as this car needed to be stressless and I dind't want to sorry about getting my tire damaged or getting the wheels damaged with the ultra low and stretched tire. Therefor I went for a bit more race look... Went for the Nankang tires as Toyo Tires didn't had the correct size available for the 17" I needed.

The interior, the part where most guys click away - Ha! I always like to do things different. From metal seats in my previous E30 to full carbon seats in this one. You either like it or you hate it bigtime. As for the color we went for the green/yellow-ish one as it matched our hoodies which we dropped at the time perfectly.
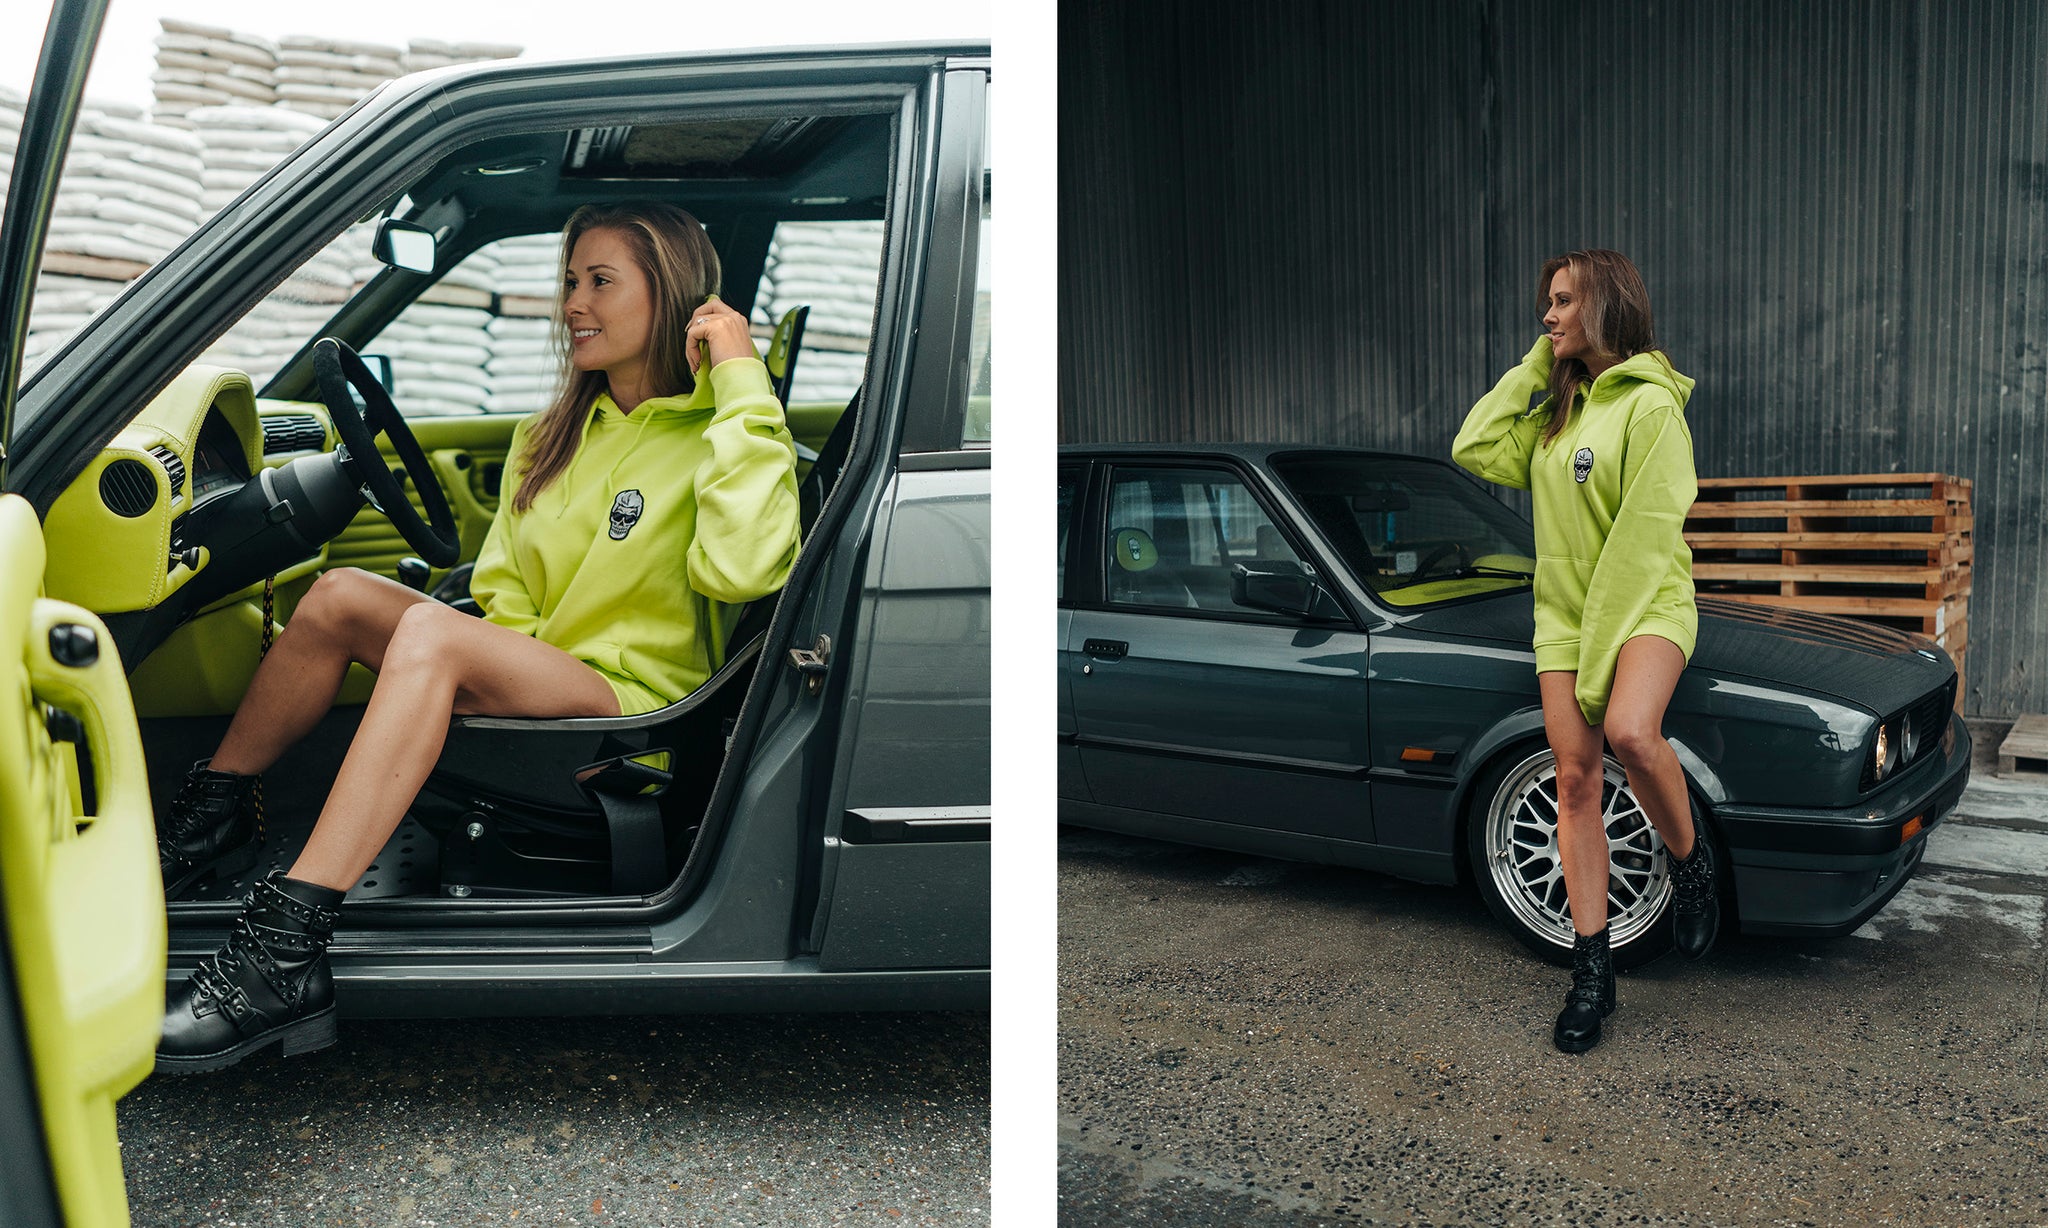
I think the green works perfectly with the grey exterior color and it really pops. A black interior would have been appreciated by more people but in the end, I built that car for me, for me and the dogs. That's also why there's no back seat and that's also the reason why I bought the wagon in the first place, so I could take the dogs with me.

Rocking a full AccuAir ENDO CVT kit with e-level management gives the opportunity to spare out some booth space so the doggos have all the space they want in the back and I can do off-road, on-road and do basically everything with the adjustable suspension.


As for now, the car is on the road for a year and a half, drives, starts, runs perfectly! I just added another front (lower) lip and I'm changing the air suspension to a KW coilover kit. The car is going somewhere where hot temperatures give problems to aftermarket air suspension and I don't want to end up with that!

The new and lower lip in full action! Be sure to check out our latest collection too!
